To execute the Exchange Server Scan, a trust relationship between the "SpaceObServer scan service" and the Exchange Server is needed. For this purpose, an valid SSL Certificate for the Internet Information Services (IIS) is required on your system. The certificate has to be installed to the certificate store of the user who is executing the Exchange Server scan. Depending on the server settings it might be necessary to additionally install the certificate to the certificate store on the computer SpaceObServer is running on.
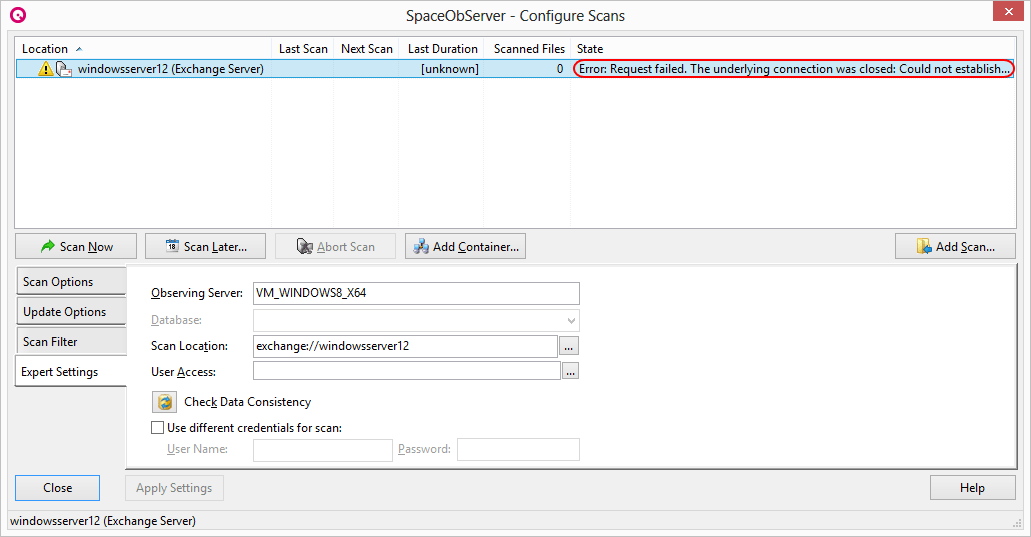
If the SSL certificate is not installed properly, SpaceObServer will display the following error message in the Scan Settings when you start the scan:
Please perform the following steps to install the required SSL certificate on your computer (The following steps may vary slightly depending on the computer configuration):
Installing the SSL certificate:
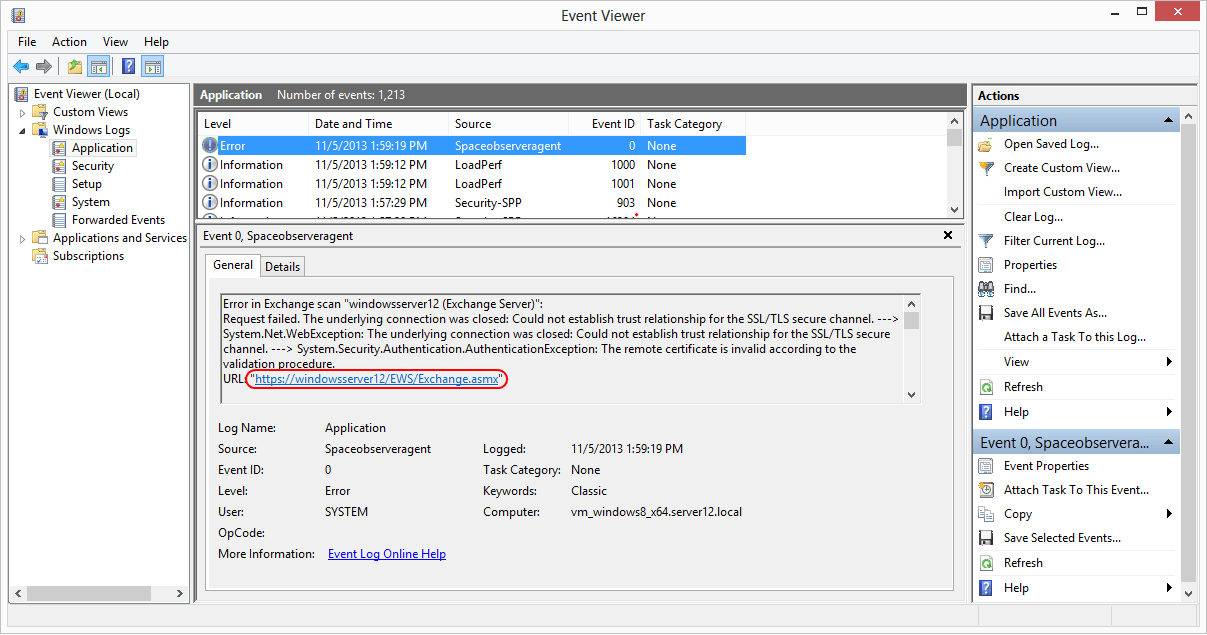
1. Open the Windows Event Viewer (Category "Application") and select the last error message of the source "SpaceObServer scan service". Click on the link in the "General" tab ('https://servername/EWS/Exchange.asmx"):
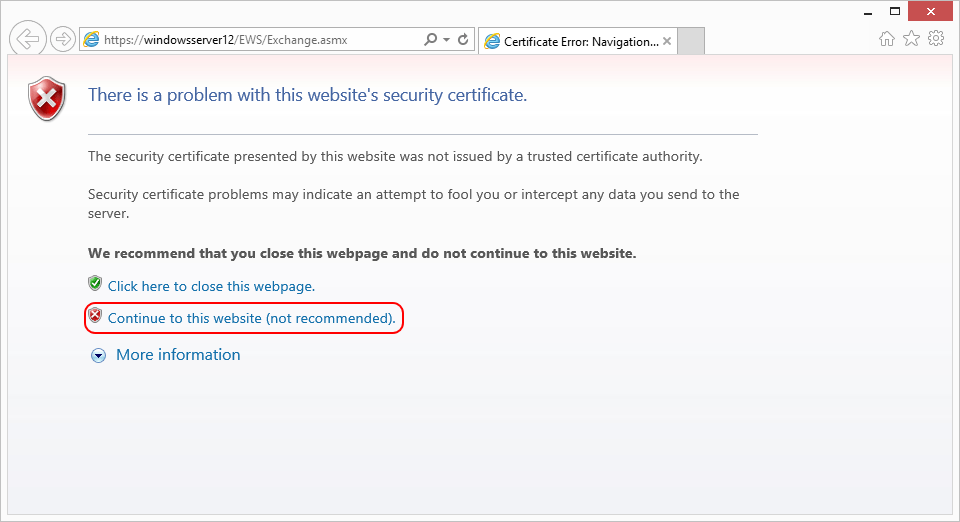
2. The link will open in your Windows Internet Explorer. You may need to enter your username and password here on in the next step. On the resulting page, click on "Continue to this website (not recommended)":
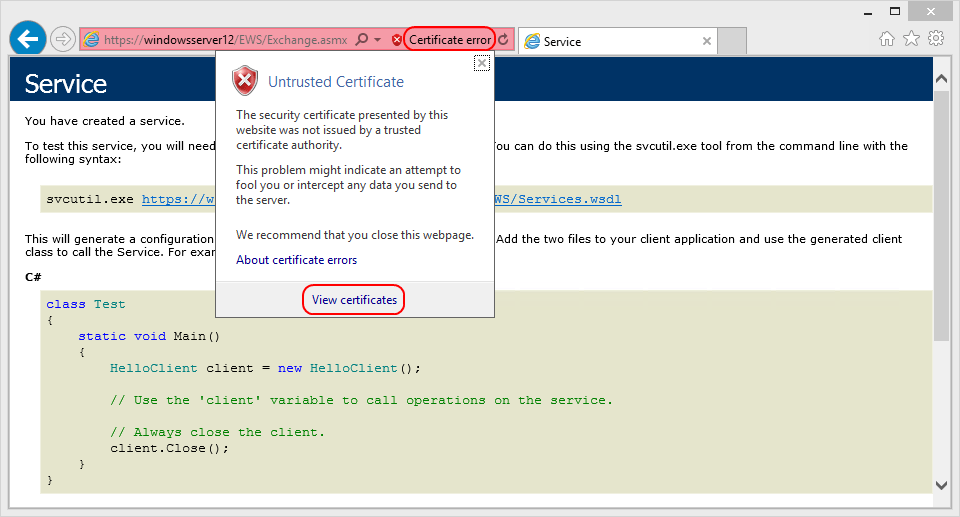
3. To view the certificate first click on "Certificate Error". Afterwards click on "View certificates":
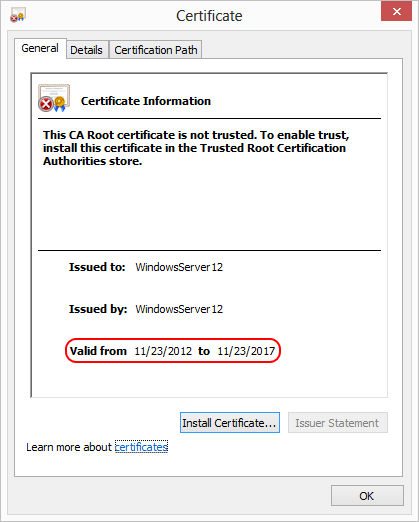
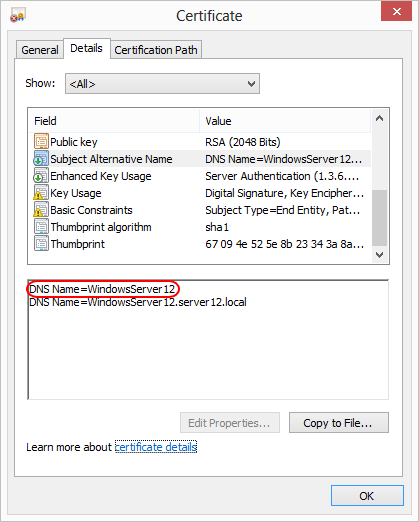
4. Please ensure that the certificate is valid and that the DNS-Name of the server is listed in the certificate details:
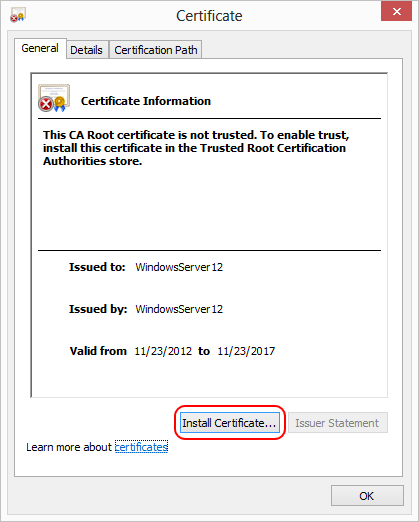
5. The certificate installation can be started by clicking "Install Certificate...":
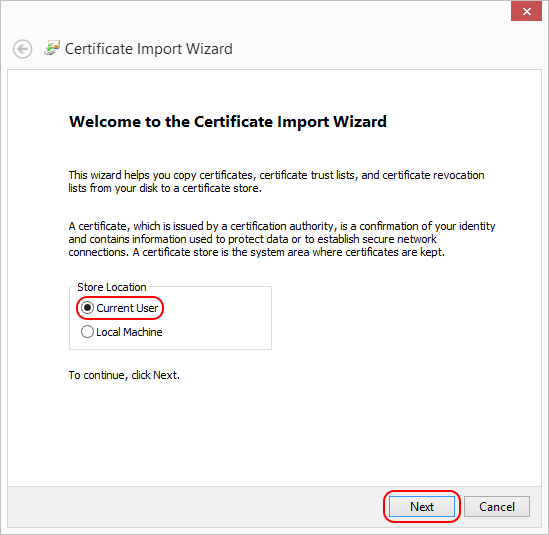
6. In the upcoming Certificate Import Wizard, first select "Current User" before confirming the selection with "Next". If there is no opportunity to choice, just confirm with "Next":
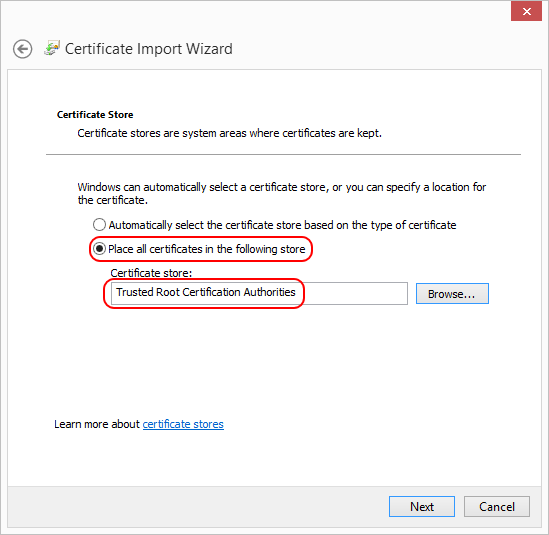
7. The certificate must be stored in the certificate store "Trusted Root Certification Authorities", which can be selected by using the "Browse..." button:
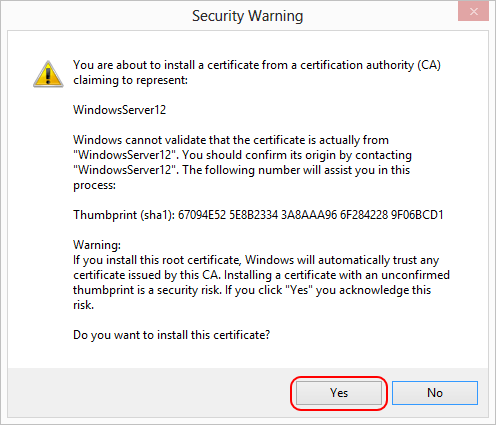
8. After pressing the "Next" button and a subsequent click on "Finish", you will receive the following security warning that you have to confirm with "Yes":
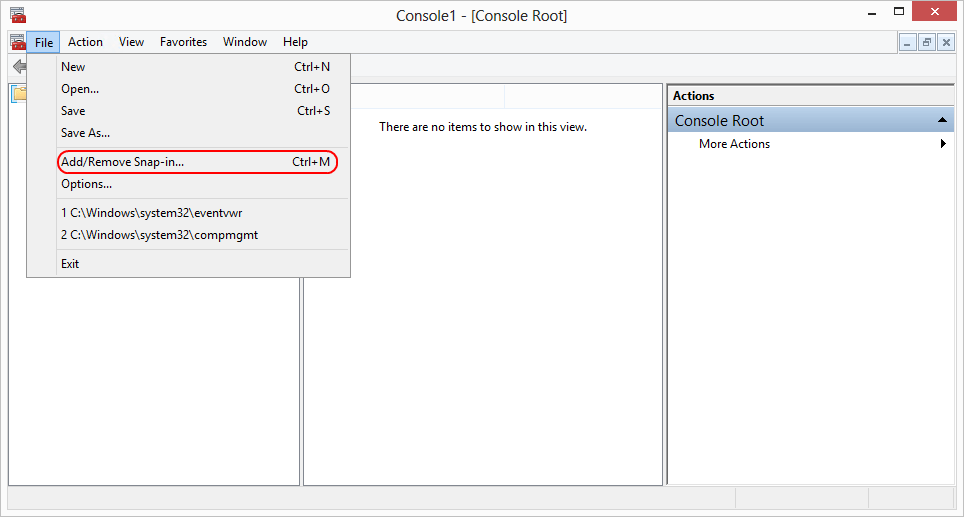
9. After installing the certificate, it must be available for the current SpaceObServer user. To do this, open the Microsoft Management Console ("C:\Windows\system32\mmc.exe") and select "File>Add/Remove Snap-in...":
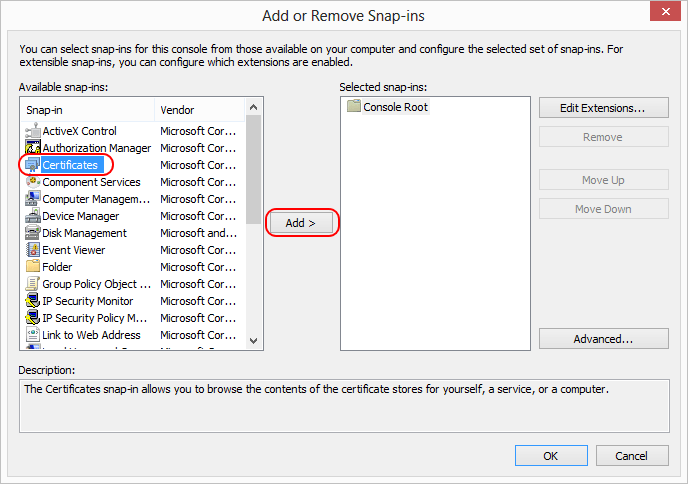
10. Select "Certificates" in the "Available snap-ins" and click the "Add" button afterwards:
11. Select "My user account" in the subsequent dialog:

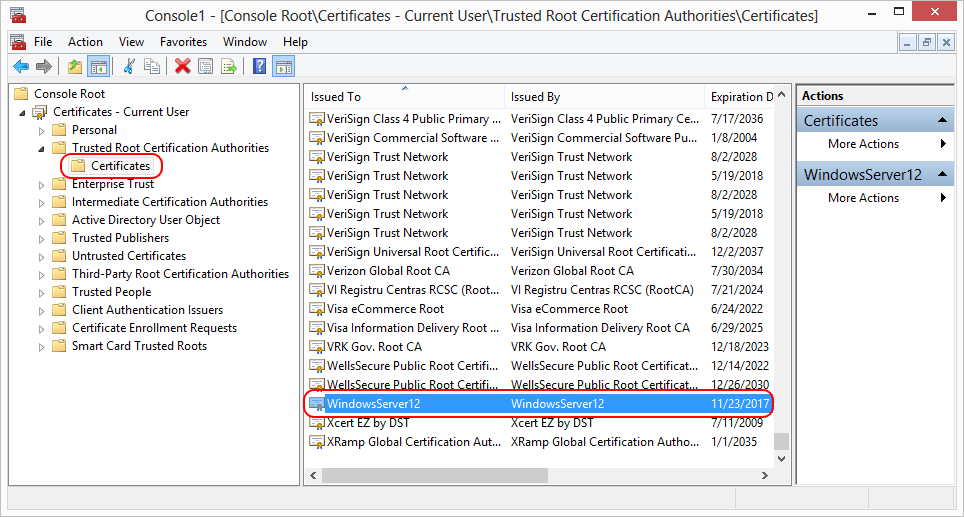
12. The certificate is now available under "Trusted Root Certification Authorities>Certificates":
13. Now start the Space Observer Exchange scan again after you have restarted the service "SpaceObServer scan service".
14. Depending on the settings it might be necessary to additionally install the certificate to the certificate store of the computer. Therefore add besides the certificates of the current user also the certificates of the local computer to the Console Root, by repeating steps 8 - 11 whereas you have to choose 'Computer account' instead of 'My user account' at step 10. After clicking 'next' choose 'Local computer' and confirm your choice.
15. To transfer the certificate, select it by right-clicking on the Certificates of the current user (Screenshot Step 11) and select 'Copy'.
16. Now navigate in the console root to the corresponding certificates of the local computer (Console Root> Certificates (Local Computer)> Trusted Root Certification Authorities> Certificates).
17. On the right side the certificates of the local computer are now displayed. Click with the right mouse button in an empty area and select 'Paste'. The certificate should now be displayed under the Certificates of the 'Trusted Root Certification Authorities'.
18. Now start the SpaceObServer Exchange scan after you have restarted the service "SpaceObServer scan service".
If the above error message persists, please verify that the Internet Information Service (ISS) is associated with the certificate:
1.Open the "Exchange Management Console" ("Start > Programs > Microsoft Exchange Server 2007 (respectively 2010, 2013)") on your Exchange Server.
2.Select your Exchange server and navigate to "Server Configuration".
3.In the "Server Configuration" area please verify that the Internet Information Service (IIS) is associated with the used certificate, by checking the "Services" column. If this is not the case, select the certificate and click "Assign Services to certificate ... " in the Actions pane.
4.In the upcoming dialog, check the checkbox "Internet Information Services" and click "Next".
5.The certificate is now assigned to the selected service. During this process, messages to overwrite other certificates can be displayed. Confirm these dialogs with "No".
6.Complete the process by clicking on "Finish". The IIS service is now assigned to the certificate and should be displayed in the "Services" column for the appropriate certificate.