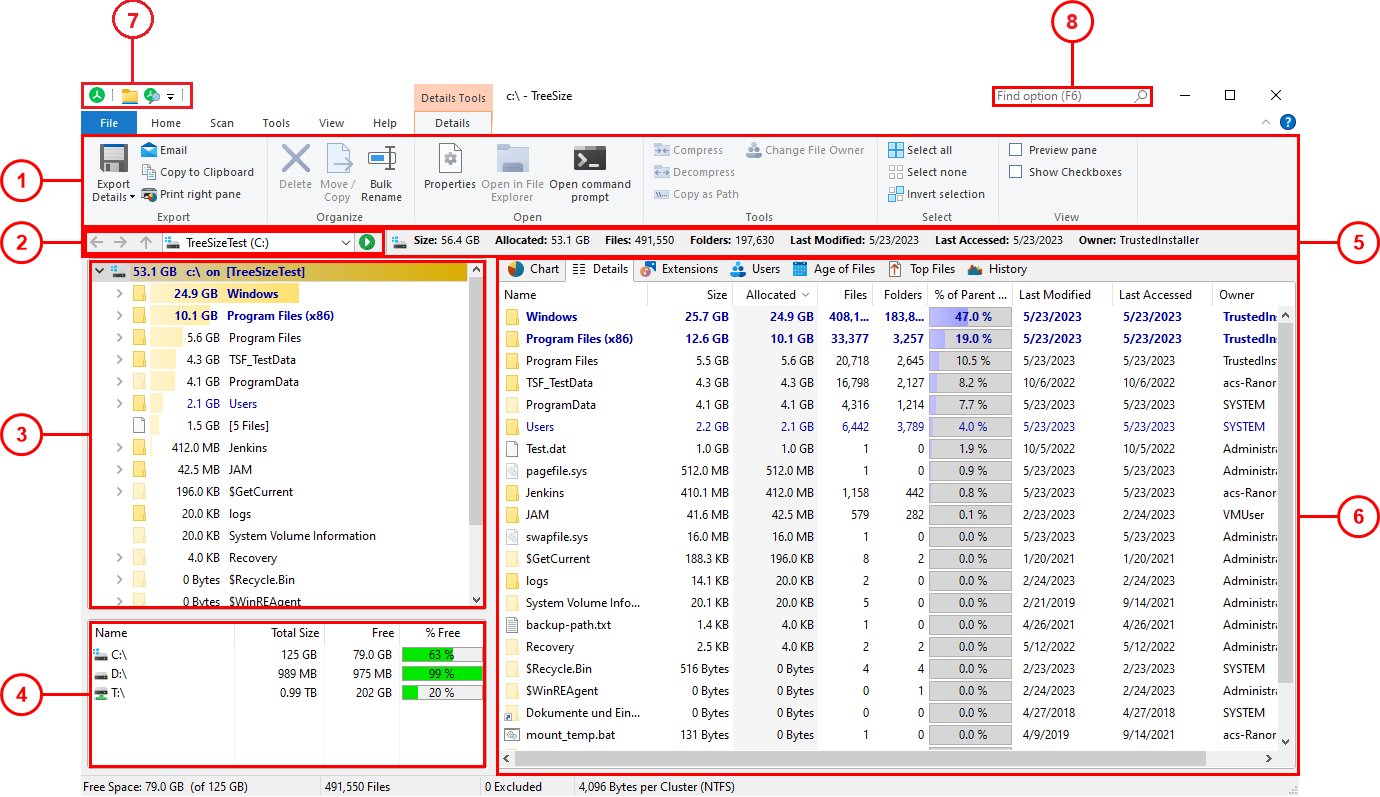
After the installation, TreeSize can be started using the Windows Start menu/screen or the context menu of a folder or drive. These are the important elements of the TreeSize main window:
|
1. |
The Ribbon Bar provides access to all commands of TreeSize. It is divided into logical sections such as the "Home" tab containing commonly used functions and elements, or the "View" tab enabling you to customize the appearance of TreeSize. The colored tab to the right is a context-sensitive depending on the currently active view. Use the "Select directory for scan" to start the scanning process for a drive or folder. |
|
2. |
This section contains a drop-down list enabling you to select a drive or folder to be scanned. You can enter paths directly in the control field. Press enter or click the scan button on the right to start a scan for the entered path. TreeSize will remember recently used paths and add them to the list. |
|
3. |
The Directory Tree of the scanned folder or drive provides an immediate overview of the size of each folder. |
|
4. |
The Drive List provides an overview of all local and mapped network drives. Additional network drives can be added using the context menu. Double-click on a drive to start a scan in TreeSize. |
|
5. |
This section will provide additional information regarding the scanned path (e.g. its total size and the number of folders contained). |
|
6. |
The view section contains several different tabs, each of them providing a highly specialized data view of the currently selected drive or folder. As soon as a view is activated, the corresponding context tab will become active on which you will find useful commands for this view. These are the available views of TreeSize: |
|
|
•The "Chart" view visualizes folder information either as a "Pie Chart, "Bar Chart" or as a "Treemap Chart". •The "Details" view will provide you detailed information on all files and folders contained in the current selected item in the Directory Tree •The "Extensions" view presents information on size grouped by file types. Thus, you'll gain an overview of the types of files that use up most of the disk space. •The "Users" view shows information on size grouped by users. You will see at a glance which user uses how much space in which folder. •The "Age of Files" view shows the distribution of the age of scanned files, based on a certain date attribute. •The "Top Files" view lists the largest files in the scanned path along with several other details. •The "History" view shows changes in for the scanned path in a line chart.
|
|
7. |
The Quick Access Toolbar is a customizable shortcut to many useful functions of TreeSize. |
|
8. |
The "Find option"-searchbox (available with Windows 10 or later) allows to search for functions and settings with an ease and trigger them directly, or navigate to them. |