

Checklist for a Smooth Upgrade to Windows 11
Let's prepare your PC together
Jens Fichter
The leap from Windows 10 to Windows 11 promises exciting innovations, from a fresh user interface to improved multitasking.
Are you still running Windows 10 and would like to upgrade? Let's get your computer ready for the new version together! With our checklist you can ensure that your PC is optimally prepared for the upgrade to Windows 11 so your upgrade will be as smooth as possible:
- Check system requirements and compatibility
- Clean up the hard disk
- Create a backup plan and create a backup:
- Check free storage space
- Perform upgrade
1. Check system requirements and compatibility
Microsoft has updated and extended the minimum system requirements for Windows 11 compared to previous versions.
First, use Microsoft's PC Health Check tool to check whether your PC is compatible with Windows 11.
Windows 11 requires TPM 2.0. TPM 2.0 (Trusted Platform Module Version 2.0) is used in Windows 11, for example, for identity protection and to protect your data. Older processors usually do not have this module - an installation of Windows 11on those systems is not possible without detours.
Here is a detailed overview of the necessary system requirements:
- Processor: A compatible 64-bit processor with at least 1 GHz clock frequency and two or more cores.
- RAM: At least 4 GB RAM.
- Memory: At least 64 GB free memory.
- Firmware: UEFI, Secure Boot capable.
- TPM: Trusted Platform Module (TPM) version 2.0.
- Graphics card: DirectX 12 compatible graphics card / GPU with a WDDM 2.x driver.
- Display: At least 9" with HD resolution (720p).
- Internet connection: Internet connection is required to download and install the upgrade.
2. Tidy up the hard disk
Next, let's make space for the update on your PC and also tidy up a bit. Our tool TreeSize can help.
TreeSize analyses and visualises your PC's hard disk space to detect large or unnecessary files. You can then delete files and free up space directly with TreeSize.
First download and install the free trial version and proceed as follows:
Find and delete duplicate files
Duplicate files, also called duplicates, waste valuable storage space. So let's start right here.
To find duplicates, activate TreeSize File Search and select Duplicate Search.
We recommend defining a minimum size for the search in order to skip smaller, unimportant files. You are welcome to use the preset value of 10 MB. However, if you have many text documents, it may be worthwhile to also find files with a size of less than 1 MB.
Many duplicate files can be replaced with "NTFS hard links" and thus save quite a bit of storage space.
However, only replace files if you are sure that no programmes are accessing them, otherwise this could lead to problems. You can find more information on this in our Blog on removing duplicate files.
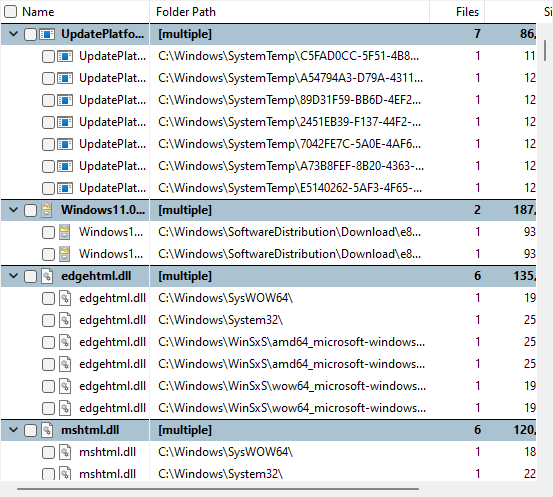
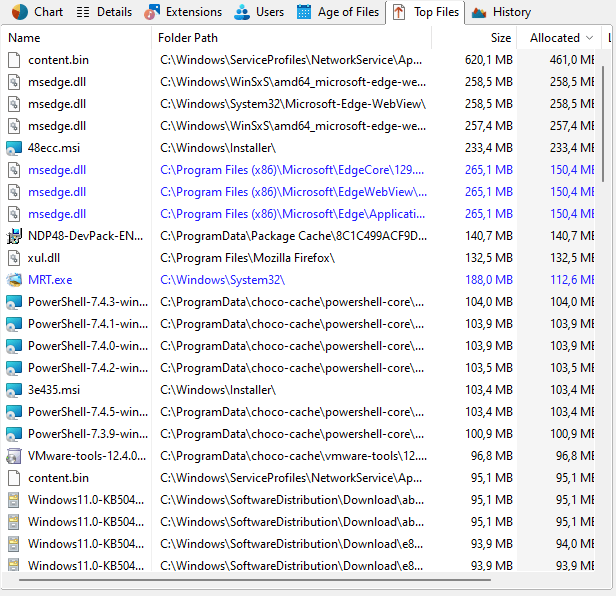
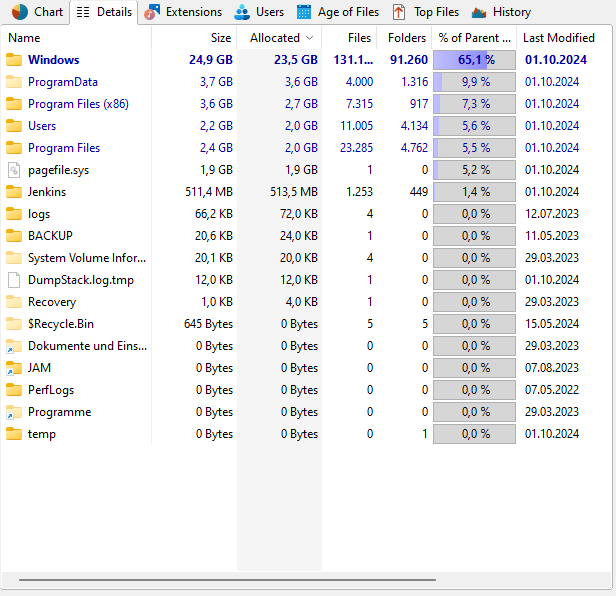
Identification and deletion of large files and folders
With TreeSize you can also display the largest files on your PC in a list.
To do this, make a hard disk scan of your desired drive, for example the C:\ drive, and switch to the "Top Files" tab. This way TreeSize ensures that you can find and remove all space hogs.
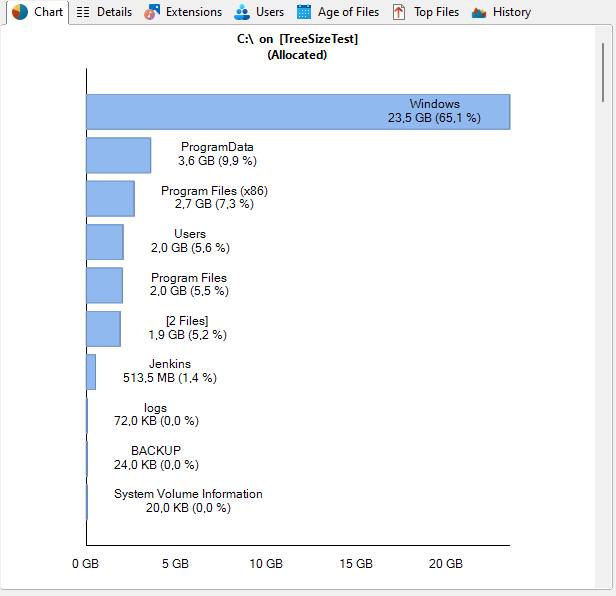
Diagrams also help to identify large folders and take a closer look.
These can then be called up and opened via the detail list in order to be able to free up storage space. Here you can also show helpful columns with meta information or hide superfluous ones:
3. Create a backup plan and backup
Something can always go wrong during an upgrade. That is why you should create a backup of your current system before you start the upgrade. The following five steps make it easy:
Determination of the data to be backed up
Identify all important files, documents, pictures, videos, music and other data that need to be backed up.
Don't forget to include email data, browser bookmarks and settings, and other application data.
Selection of the backup medium
Decide whether you want to use an external drive, a network hard disk (NAS) or a cloud service for the backup.
Selection of the backup software
Choose a reliable backup software that meets your requirements.
Make sure the software supports incremental backups to save time and storage space.
Backup planning
Set a time for the backup that is least disruptive to your work routine.
Consider setting up regular, automated backups to continuously protect your data.
Carrying out the backup
Perform the backup and ensure that all desired data is correctly backed up.
Check the backup logs for possible errors and make sure that the backup was completed successfully.
Adding forgotten files afterwards
Nothing is more annoying than finding out afterwards that you have forgotten an important folder or individual files. With the TreeSize file search you can quickly check whether you have considered all important files when creating the backup plan and add some if necessary.
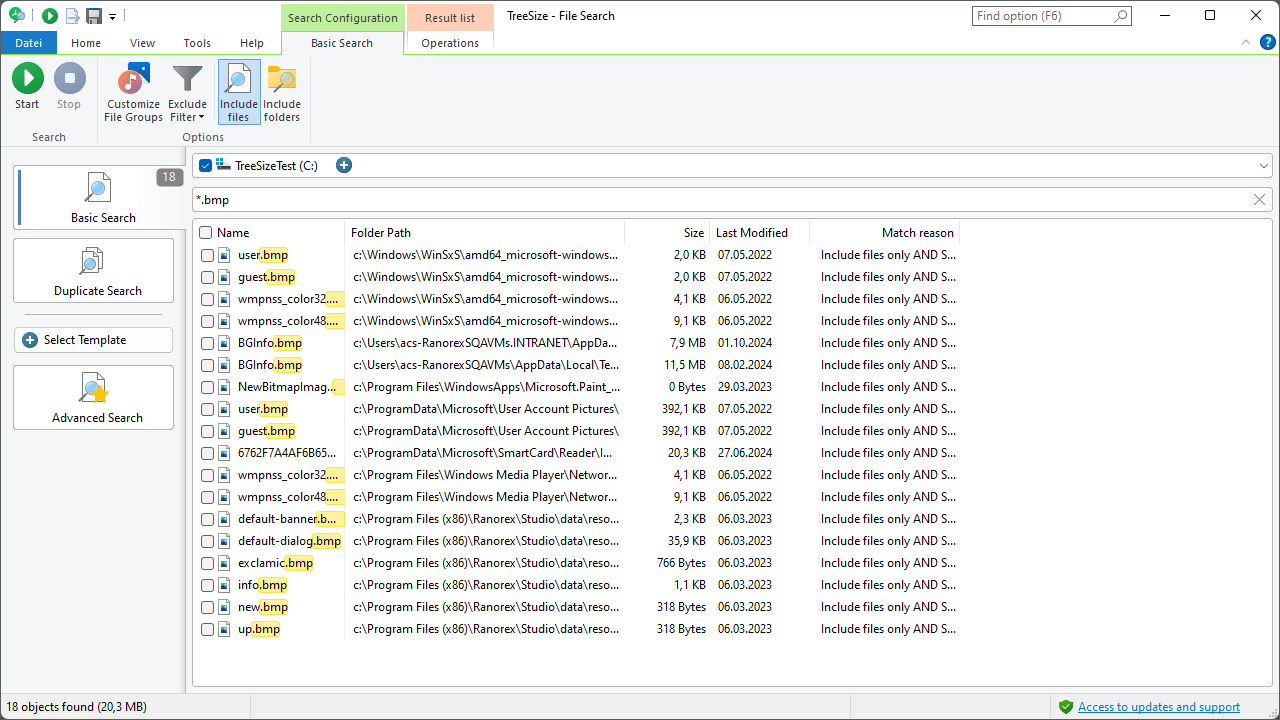
With the simple search function, you can search your PC or individual drives/volumes for specific files and still back them up later or add them to the backup plan.
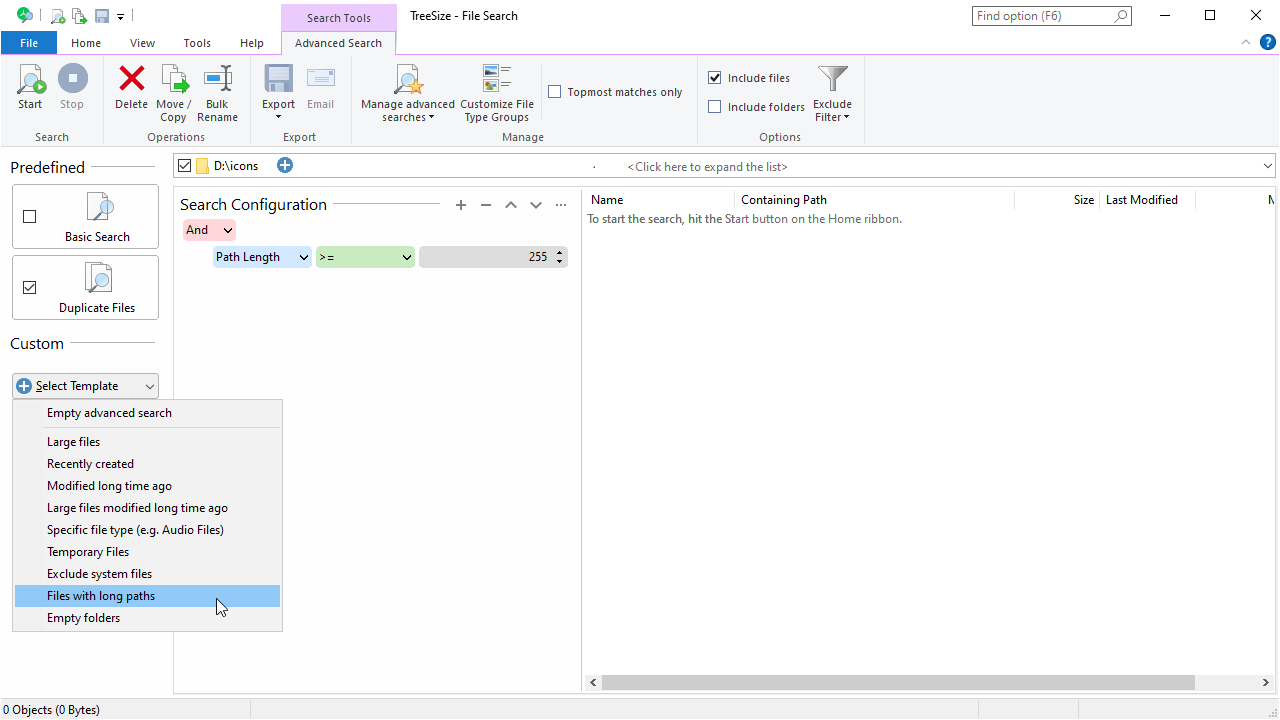
If you want to search for specific file types, for example to see if you have considered all the images, the advanced search is the tool to go for.
It offers a wide range of possible settings, including the combination of simple filter patterns with the matching of date values and size. This allows you to find and save not only images but also, for example, PDF files or PowerPoint presentations.
You can also filter results afterwards or export them in various formats. This way you always have the results at a glance and can compare them with your backup.
4. Final check for free storage space
At least 64 GB of free storage space is required for the upgrade. You can quickly and easily recognise free storage space on the pie chart:
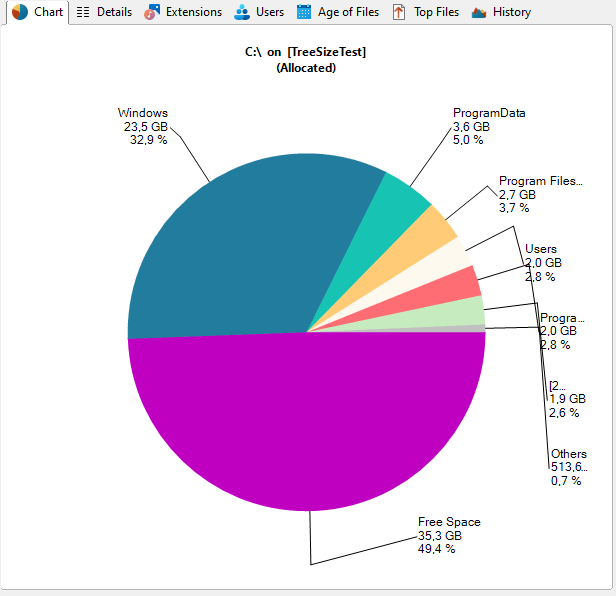
If there isn’t enough free storage space, please repeat Step 2.
5. Implementation of the upgrade
Now that your system is ready for the upgrade, here are the steps to install Windows 11:
Review of all important data
Even if you have already backed up, it is good practice to do a final check of all important data and make sure everything is backed up.
Check Windows Update
Make sure you have all the latest updates for Windows 10 installed by going to Settings > Update and Security > Windows Update and checking for updates.
Perform upgrade
As soon as Windows 11 is available, it will be shown via Windows Update.
Follow the instructions on the screen to perform the upgrade.
This can take up to three hours depending on your system. So make sure your PC is connected to the mains and you have enough time to monitor the upgrade process.
After the upgrade:
After the upgrade is complete, check that all your applications and files are still present and working.
Explore the new operating system, adjust your settings and install all the necessary updates that have come out since the release of Windows 11.
Let's go, with Windows 11
If your upgrade was successful, you can now look forward to these exciting new features in Windows 11.
Our tip: Why not try out TreeSize for a little longer?
All the steps you took to identify and clean up duplicate, very large or obsolete files with TreeSize can be repeated regularly. This ensures that you always make the best use of your available hard drive space!
Take a look at our practical application scenarios to see what else TreeSize can do. Have fun trying it out!
Want to always stay up to date? Subscribe to our newsletter now!
Do you like what you've just read, have new ideas or feedback? Visit our contact form and let us know your thoughts!